Ever stared at someone’s avatar and thought, “How did they make that?” You’re not alone. Over 40 million daily players log in, flexing their avatar fashion. Now imagine seeing your design walk around in-game. Cool, right? You don’t need to be a pro or own fancy software to make that happen. Just bring a bit of patience, a splash of creativity, and maybe your favorite snack.
Table of Contents
Key Points:
- You don’t need to download a template first
- Alive Studio makes edits easier with preloaded tools
- Transparent PNG is the format you’ll need
- You must be a Premium user to upload
- Patience helps when things look off at first
How to Design and Upload Custom Roblox Avatar Shirts Without Coding Skills

No coding. No advanced art degree. No stress.
Here’s the breakdown. If you can click and drag, you can create.
Start by opening a simple image editor. That can be Photoshop, GIMP, or an online tool. If none of that sounds fun, go to Roblox shirt template. Alive Studio has the base template already set up, so you skip the annoying downloads and jump straight into customizing.
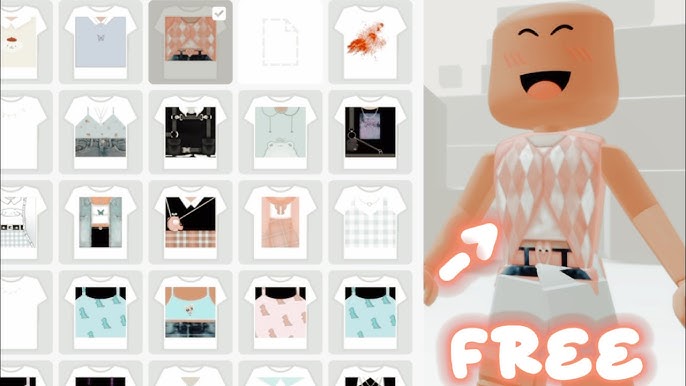
That .png layout shows all parts of the avatar torso. Think of it like paper dolls but digital—each square matches part of the body. You can throw on colors, logos, text, stripes, or whatever weird brilliance your brain invents. Just keep the image 585×559 pixels. That’s the sweet spot.
Pro tip: Keep your main art in the center chest area first. That’s what everyone sees. You can add more once you see how it fits.
Picking the Right Tools That Don’t Burn You Out
You don’t need expensive gear or five layers of software. Start small.
Pixlr, Photopea, and Alive Studio are friendly for total beginners. Just open your browser and start clicking. No installs. No lag. If you want more control, GIMP offers advanced layering and effects. Photoshop too, if you already have it.
But here’s the real secret: most pros start with Alive Studio and stay there. Why? Because it already has the template loaded. No mistakes on alignment. No lost pixels. You just focus on the fun stuff.
Create Your Design

Open your editor of choice. Load the .png base. Think of it as your mannequin.
Now you need colors, patterns, maybe a logo. Keep it simple on the first try. Your first design won’t be perfect, and that’s normal. You’ll see weird seams or folds—don’t freak out.
It helps to sketch your idea on paper before jumping in. Block out the chest area, the arms, the back. Think of symmetry. Think of what stands out.
Fill each part slowly. Don’t rush the sleeves. They twist in weird ways. The back? Keep it chill. Maybe a stripe or a lowkey icon. The magic happens when it wraps correctly. And remember, it might look weird now, but trust the process.
Test Your Design Before Uploading
Before you rush to upload, test your PNG on a 3D preview. Alive Studio has that built in. No need to imagine how it wraps—it shows you instantly.
Why does this matter? Because your perfect logo can end up slapped under the avatar’s arm if you guessed the panel wrong. It happens more than you’d think.
So look closely. Spin the model around. Double-check all seams. If something feels off, go back to your editor. Small fixes make a huge difference. Your future self will thank you.
Upload It to Roblox
Here’s the part where people panic. Don’t. Just follow the steps.
You need a transparent PNG. You also need a Premium account. Roblox doesn’t allow uploads without it. That rule surprises a lot of people.
To upload:
- Log into Roblox
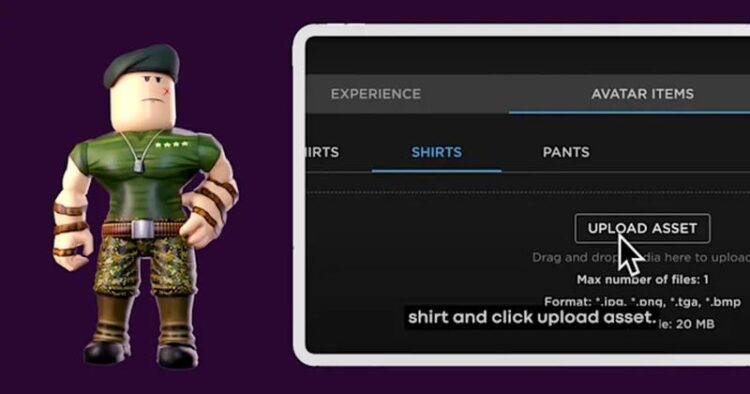
- Go to Create > Avatar Items
- Select Shirts
- Click Choose File
- Pick your design
- Name it
- Hit Upload
Now wait. Moderation takes time. Sometimes a few minutes. Sometimes hours. Don’t spam upload. That might flag your account.
Fix the Common Mistakes
Even the best artists mess up. Your first few tries might look like Picasso on a bad day. Totally normal.
White boxes? That means your file isn’t transparent. Blurry lines? Wrong image size. Logo misplaced? Check the side panels.
The key is not rage-quitting. Keep the PSD file or whatever format you used. Edit and re-upload. It gets easier.
Level Up Your Creativity With These Quick Wins
You made your first design. Nice. But now you want it to stand out.
Add subtle shadows around the sleeves. Fake some fabric texture using brushes. Use glowing outlines if your theme allows it. Neon? Sure. 90s grunge? Why not. Throw on a grid. Or blend gradients.
You don’t have to reinvent fashion. You just need a concept. Themes work:
- Space explorer
- Retro diner staff
- Arcade champion
- Anime sidekick
- Streetwear robot
Try weird combos. Let your imagination run free. The fun multiplies when your friends start noticing your work.
Share, Flex, or Even Sell It
After your upload goes through, you can wear it, gift it, or show it off. But here’s a bonus: you can sell it.
Make sure the item is Public. You can find it in your inventory, click the gear icon, then select Configure. Enable “Sales,” set your price, and boom. You’re in business.
Now drop the link in your Roblox group. Or your Discord server. Let friends try it out. Watch your Robux count go up. Slowly, maybe. But every little win counts.
Learn From Other Creators Who Started Small
You’re not alone in this creative grind. Plenty of artists began with zero skill. They didn’t know what panel mapped to the sleeve or how to clean up their jagged lines.
Over time, they watched tutorials. They joined Roblox creator forums. They posted early work and asked for feedback. It wasn’t always kind. But it helped.
Find a Discord server that shares Roblox art. Ask questions. Offer tips. Share your screenshots. Just don’t create in a vacuum. That gets lonely fast.
Use Real Clothing for Inspiration
Next time you scroll through Instagram or pass by a cool shirt in real life, screenshot it. Snap a photo. Reverse engineer it.
Think: what colors are used? What mood does it give off? Would it look good in blocks?
Try mixing:
- Real textures (like denim or velvet) into the design
- Patterns based on sneakers or streetwear
- Classic outfit references (suits, hoodies, workwear)
You can turn your closet into a mood board. Look for tags, zippers, logo placements. Reality has better ideas than Pinterest sometimes.
Build a Brand If You Get Addicted
If you’re reading this far, you probably caught the design bug. So why stop at one shirt? Build a collection.
Give your items a name that fits a theme. Use matching color palettes. Add tags to each upload so people know it’s part of a set.
And once you get good? Start a group. Host a little showcase. Invite others to submit their outfits based on your pieces.
Suddenly, you’re not just designing. You’re leading a style wave inside Roblox. Now that’s a flex.